
Hooray! It’s CAL Day!!! Welcome to the official start of the Scheepjes Festival of lights CAL. For the first part of the CAL we will be working on the triangle motifs. There are a lot of them, so this section is going to span over two weeks.
The written PDF of the pattern can be found here on the Scheepjes website.
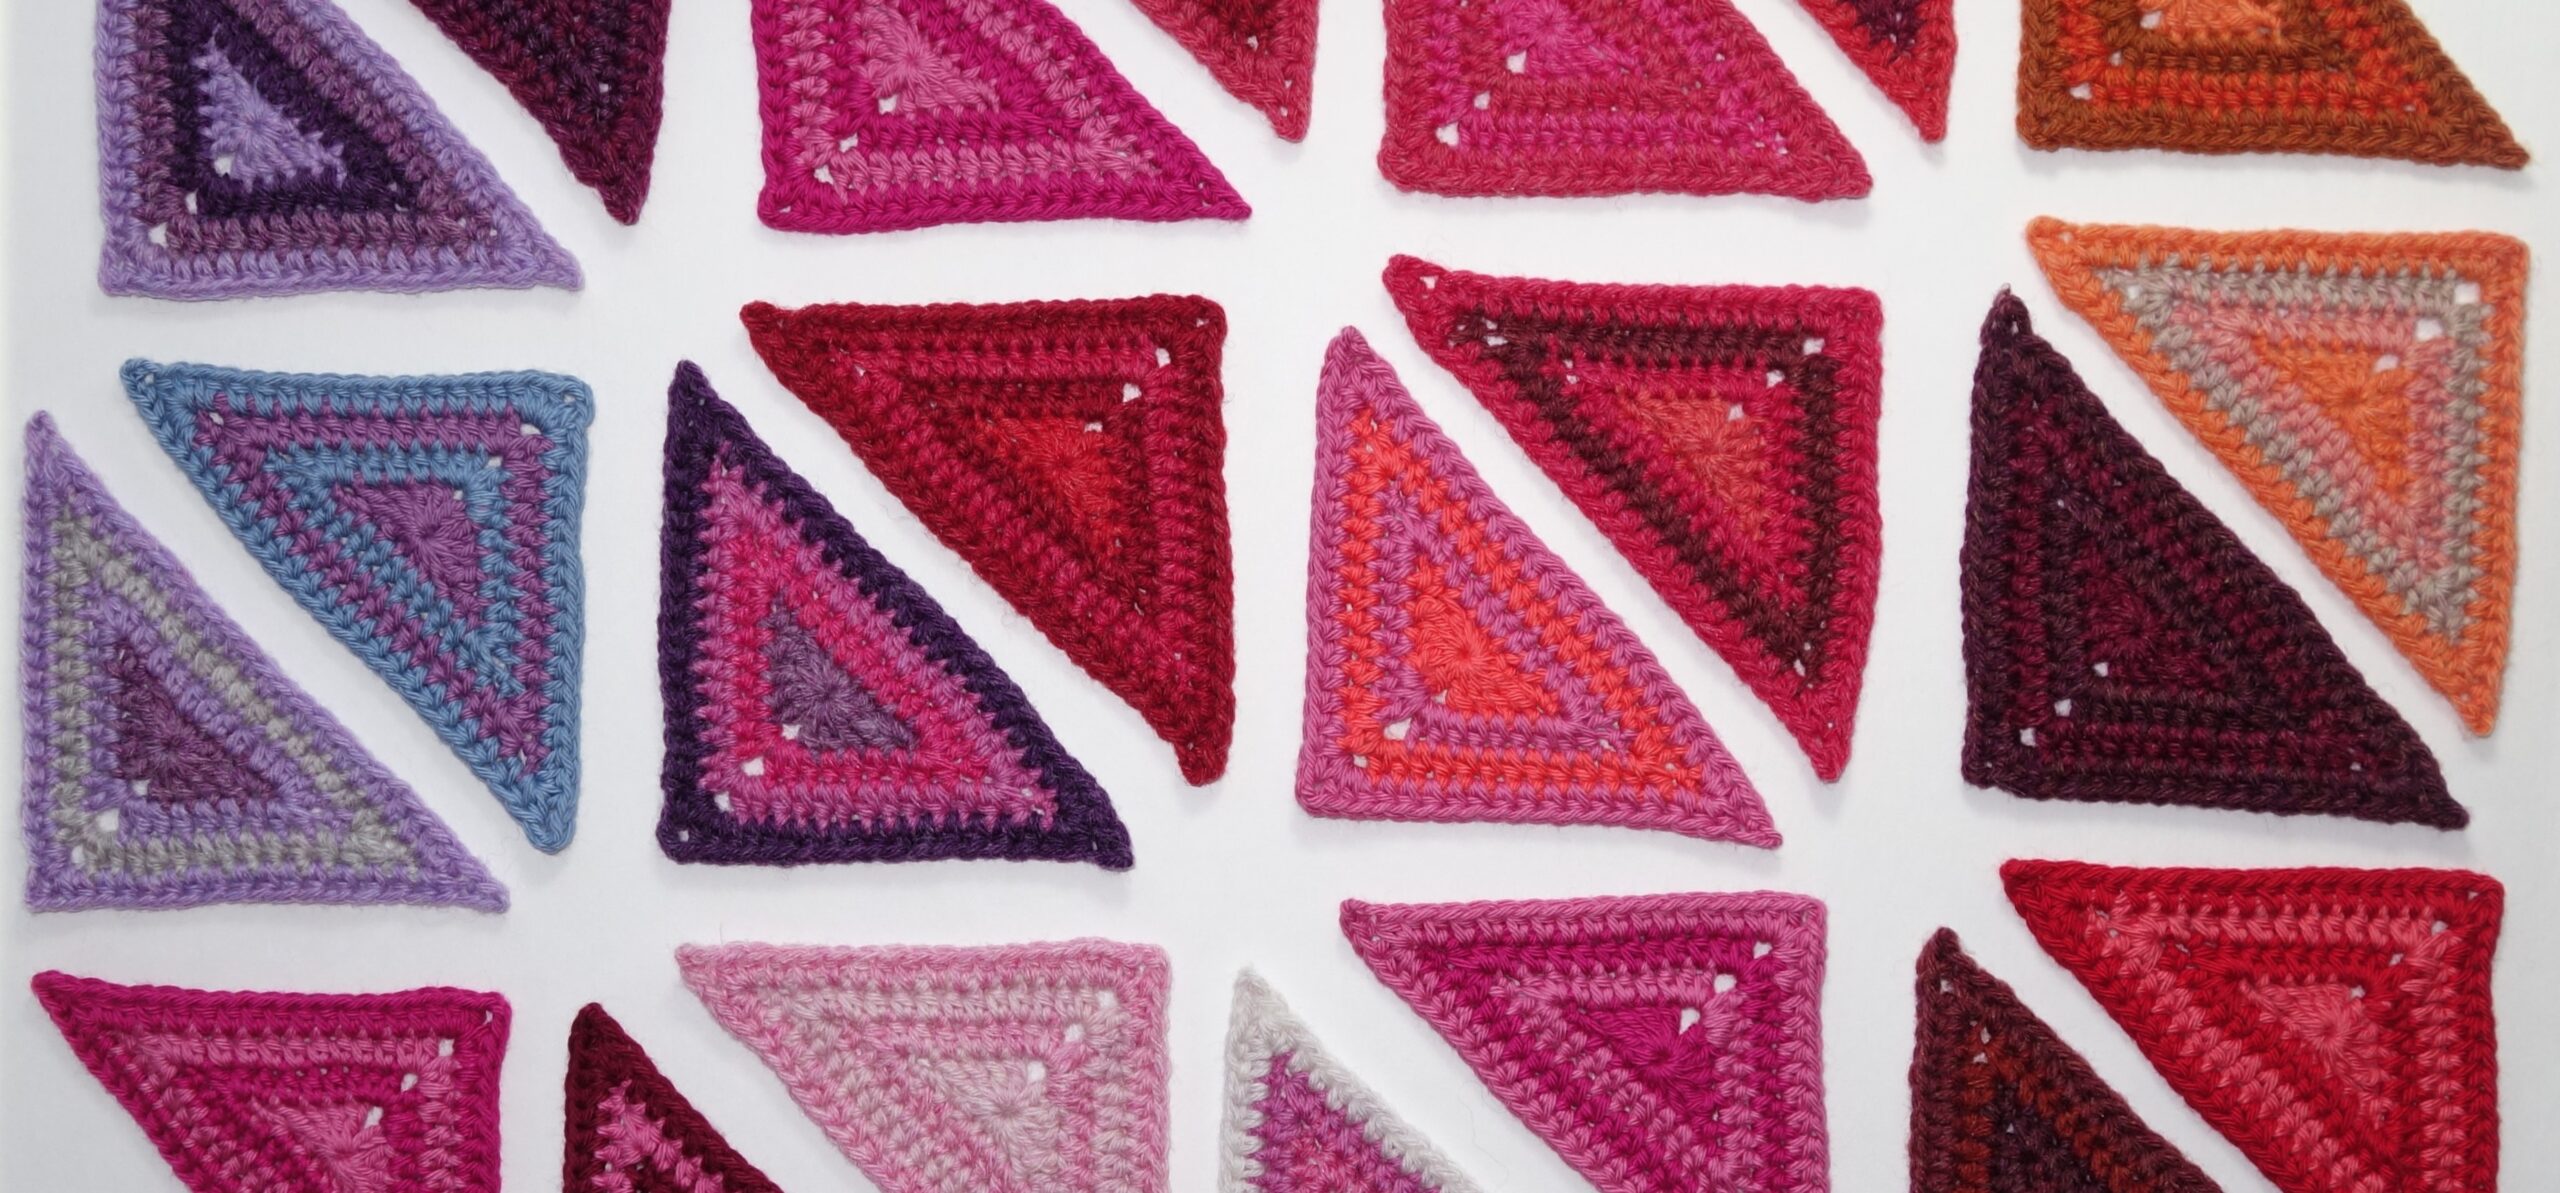
For photos to accompany the pattern jump to the bottom of this post here.
Important Links
- My Main CAL Information Page
- Bonus Blog (FAQ, Yarn Quantities, Enlarging)
- The Scheepjes website page for the CAL – English/Nederlands
- Scheepjes official Tips and Tricks PDF
- Scheepjes International Facebook Group https://www.facebook.com/groups/ScheepjesCAL.International/
- Scheepjes Nederlandse Facebook Groep https://www.facebook.com/groups/scheepjescal/
- YouTube Video Playlists for the CAL
- Ravelry Pattern Page
- USA: Jimmy Beans Wool Scheepjes Yarn: Organicon Kit / Metropolis Kit
- World wide: Color packs in the Scheepjes Amazon Shop
Contents
- Getting Started
- Video Links
- Using the Color Placement Chart
- The Assembly Line Method
- Gauge
- Dealing with Ends
- Special Stitches and Techniques
- Supplemental Photos
- Modifications for a Single Color
- Support My Work
- Important Links
Getting Started
Scheepjes has made two beautiful official kits for this CAL of Scheepjes Metropolis and Organicon yarns.
To purchase a kit, you can check for a Scheepjes Retailer in your area, or please consider using my affiliate link below. Shopping though this link earns me a small commission to support my design work at no additional cost to you. Thank You!
World wide: Color packs in the Scheepjes Amazon Shop
USA: Jimmy Beans Wool Scheepjes Yarn: Organicon Kit / Metropolis Kit
Kits are sold out in many places, you can find more information on yarn that is in the kit and estimates for other scheepjes yarns in this post here.
If you haven’t already, I highly recommend joining the Scheepjes Facebook Groups. The groups are incredibly friendly and supportive. There you can share progress photos, get inspiration, and ask for help if needed.
- Worldwide: Scheepjes International Facebook Group
- Dutch: Scheepjes Dutch Facebook Group
I have also made video tutorials for this CAL that I will be posting for each part on my YouTube Channel.
There will not be a complete photo tutorial for this pattern, but I will provide some supplementary photographs for the trickier bits on the blog post for each piece of the pattern.
Video Link
I have made videos tutorials for all the parts of this CAL here are the links for this week. There are videos for UK and US terms. I have also tried to make them clear enough visually that it will still be helpful without the sound.
- Festival of Lights Scheepjes CAL – Part 1 – UK Terms – Right-handed
- Festival of Lights Scheepjes CAL – Part 1 – UK Terms – Left-handed
- Festival of Lights Scheepjes CAL – Part 1 – US Terms – Right-handed
- Festival of Lights Scheepjes CAL – Part 1 – US Terms – Left-handed
Een speciale dank aan Fiona Kelly voor het verzorgen van de Nederlandse voice-over! Hier vind je de video’s in het Nederlands.
- Festival of Lights Scheepjes CAL – Deel 1 – Nederlands – Rechtshandig
- Festival of Lights Scheepjes CAL – Deel 1 – Nederlands – Linkshandig
I also have an introductory video that has tips and tricks for staying organized and a little bit about my inspiration
Introduction and Tips and Trick Video
Introductie, Tips & Tricks – Nederlands
You can subscribe to my channel and turn on notifications to be notified when each video comes out.
Using the Color Placement Chart
When each part of the pattern is released two Colour Placement Tables, one for Metropolis and one for Organicon will be included in the pattern PDF on the last two pages. These table will list the required color number per round for each motif.
When a motif is completed, I recommend marking it as completed on your color placement table and labeling the motif by pinning a piece of paper with the motif number to the motif. The motif on the schematic can also be colored in to visually track progress.
Your Color Placement Tables will look slightly different than the one I show in the photo below because I didn’t have the finalized PDF’s when I took this picture.


To assist I have made a Printable PDF of labels for you to use. I recommend cutting out each group of labels and cutting between each label but leaving them attached until needed so they are easy to find. When the label is needed it can easily be found and detached to pin on the motif.
English:
Dutch:


If you accidentally mix up some colors when making your blanket here is my recommendation. Decide if it’s going to bother you, if it does frog and redo, if not you are just making your blanket special. Just keep in mind that if you use a color somewhere unexpected with the Metropolis kit you may be a little short on that color and need to swap it for a less used color somewhere else.
The Assembly Line Method
Once you are comfortable with the pattern using an “assembly line” method to get through all those motifs can speed things up quite a bit. This means working the first round a bunch of times, then the second, and so on. Here is how I like to do this for this pattern.
- Decide how large of a “batch” to work at once, this can be all the motifs or smaller groups of 5-10. Larger batches can be more efficient but might be less enjoyable because they are more repetitive, and progress is less visible. Play with the size of the batch until you figure out what you prefer.
- Pin the motif labels to the Ball Bands of the yarn used for the first round. Once the round is complete the pin the label to the motif. The partial motifs can be put to the side until some, or all the round ones are completed.
- Pin the partial motifs to the next round yarn just like the labels for round one.
- Repeat until the motif is complete.


I find that this method is great for keeping track of color placement without constantly having to refer to the color placement table. Once the labels are pinned to the yarn, they can be tossed in a basket or bag to crochet in my favorite place or taken with me.
This system is also flexible, if a round gets boring, take the finished partial motifs and pin them to the next round color and start working those, or even switch between them.
Gauge
For this project we will not be making a specific gauge swatch, instead we will crochet the first motif and measure it before adjusting.
Metropolis version: 10.5 x 6.5cm using a 3mm hook, before blocking
Organicon version: 11 x 6.5 cm using a 3mm hook, before blocking

I tend to pull on the pointy corners when I am making my triangle, this makes my point-to-point measurement larger, if your point-to-point measurement is also larger don’t worry about it if the top corner to bottom center measurement is close to measurement.

Example of two motifs I made, the first I intentionally didn’t not pull on the corners and was exactly on measurement, the second I did and my point to point is significantly larger. However, both have almost identical top corner to bottom center measurements and are the similar mass.
If you are concerned about yarn usage weighing your motifs may be reassuring. My triangle motifs average 2.7g in Metropolis and 2.9g in Organicon. If you are under about 3.1g in Metropolis you should have plenty of yarn. The Organicon Kits has plenty of extra yarn.
More generally, here are my recommendations regarding tension.
- Read up on the golden loop, Esther of “is all in a nut shell” has a fantastic blog post and video talking the golden loop. In summery the golden loop is about getting the width to height ratio of your stitches correct. If you have trouble matching gauge by changing hook size or have trouble with rippling or puckering in your crochet work start here.
- Find a hook that gives you results that are close enough. It is more important to have pieces that lay flat, are consistent and fit together than matching exact gauge so don’t stress if you are a little bit smaller or larger than the actual gauge if those goals are achieved.
- Aim for consistency, regardless of how close to the actual gauge you are, strive for consistency. I like to keep my first motif with me when making subsequent motifs then I can occasionally compare to see if they are similar. This doesn’t have to be perfect as crochet has a little stretch and blocking will help.
- Try not to stress too much. I find that a lot of things affect my tension, for example, the square when anxious is noticeably smaller than the one I made while relaxing. However, they aren’t different enough to cause a problem and blocking is going to take care of small differences.
The last thing to talk about with gauge is yarn usage. Larger motifs use up more yarn, however both kits have a bit of buffer, the Organicon kit has a substantial buffer, and the Metropolis kit has about a 15% buffer. If you do run out of a particular color, I would recommend that you put that motif to the side, some colors will have more remaining than others so you may be able to use the leftovers of a similar color.
Dealing with Ends
This pattern has a lot of ends, here are some tips to make them less overwhelming.
Weave in Ends as you go. Take a moment when finishing each motif or at least every few motifs to take care of the ends before moving on. This will make the task significantly less daunting.
Even if you like to save your ends for the end, at the very least I recommend weaving in all the ends before we get to the joining so that they are not in the way.
When possible, crochet over the ends. To crochet over the ends from the prior round I take a moment to weave the ends in a few places along the back loop when I finish a round. This makes it easy to work over the ends when the next round is crochet. The end can be woven through every back loop along a row, just a couple, or even just held in place. If the ends are making it harder to see the stitches to work in to try weaving through every loop or only 1.


When Not to Crochet Over the Ends
- The next round is mostly Post Stitches. Back and front post stitches go around the post of the stitch instead of through the loops, this means that working through the back loops and crocheting over the ends doesn’t work.
- The starting tail of a magic circle. I recommend weaving in the starting tail by spinning around the center a few times to best secure the magic circle and avoid bulk.
- When the result would be too bulky. Generally, avoid crocheting over more than one end, if it’s a small round and two ends would overlap only crochet over until the overlap then leave them for later. I am not always great at following this guideline.
- The first time through the motif pattern. Mistakes are more difficult to undo once ends are woven in, so wait until the pattern is more familiar before crocheting over the ends.
- If it is making things more difficult or confusing. If trying to work over the ends is proving difficult or causing confusion, then just wait until the motif is completed to weave in the ends.
Special Stitches and Techniques
Here are some of the stitches that will be used in this pattern.
Beginning stitches (beg sts)
In this pattern beginning stitches are used for the first stitch of a round when the yarn is already attached. For the triangle motif we will use a UK Beginning Treble Crochet (beg tr) / US Beginning Double Crochet (beg dc) in the first round.
- UK Beginning treble crochet (beg tr): 1dc, ch1 (counts as 1 tr)
- US Beginning Double crochet (beg dc): 1sc, ch1 (counts as 1 dc)
Standing stitches
In this pattern standing stitches are used for the first stitch of a round when a new yarn is used. For the triangle motif we will use a standing version of htr. To make a standing stitch make a slip knot on the hook then work the indicated stitch.
Standing stitches – Alternative Method
I like to use an alternative method of standing stitches for rounds that end with a needle join. Instead of making a slip knot simply wrap the yarn around the hook {image 1} then work the indicated stitch {image 2}. Without the slip knot, the top portion of the stitch can be removed and replaced during the needle join.


Needle Join
Cut yarn leaving long tail for weaving in end; lift loop with hook until tail emerges then thread tail onto needle {image 1},
If the round was started with a standing stitch without a slip knot, gently lift and remove the top portion of the standing stitch {image 2}.
Sk next st and insert needle from front to back through both loops of following st {image 3}.
Insert needle down through st where tail emerged and under back bump through to reverse {image 4}, pulling gently to create false st identical in size


Supplemental Photos
NOTE: If you are using the Organicon kit I have extra notes on an option for reducing ends at the end of this section.
Round 1
Beginning UK tr (US dc) in magic ring

UK 2dc (US 2sc) in the back bump of third ch from hook


UK dc2tog (US sc2tog) over back bumps of third and fourth ch from hook


Needle Join


Completed round 1
Ends Recommendation: Sew in the starting tail by spinning around the centre to reinforce the magic ring, weave the finishing tail along some of the back loops and crochet over in the next round.
Round 2
Standing UK htr (US hdc)

UK 1dc (US 1sc) in the back bump of third ch from hook


Completed round 2

Ends Recommendation: Weave both tails along some of the back loops and crochet over in the next round.
Round 3
Round 3 is similar to round 2 but the first stitch after each corner is skipped, this stitch is sometimes hidden.
Ends Recommendation: Weave both tails along some of the back loops and crochet over in the next round.
Round 4
Round 4 is like round 2, DO NOT skip the first stitch after the corners.
The stitch markers in the corners can be removed when complete they will not be needed again.

Ends Recommendation: Weave in the ends towards the bottom of round 4.
Organicon Option for Reducing Ends
For the Organicon version of the blanket all triangles alternate between two colors. If preferred, the colors may be carried between rounds instead of cutting and fastening off each round. This will reduce the number of ends per motif from 8 to 4.
Work joining ss in Yarn A to final two loops on hook, yoh with Yarn B, pull through


Ch1 a little bit loosely, this ch will be working over during the last stitch of the round. Working over the carried yarn make UK 1htr (US hdc) (this is the standing st in pattern), then drop the carried yarn behind and do not work anymore stitches over it.


Complete round 3 in the same way as round 2 changing back to Yarn B this is now Yarn D. Yarn A/C will not be used again so it can be worked over to weave in the end. Either hold Yarn A/C to the front of motif and work over while completing first side of round 4 or cut and weave in along back loops to crochet over during round 4.

Finish round 4 with a NJ as written, weave in the starting end by spinning it around the center and the last end along the bottom of round 4. When completed the carried yarn is only visible in two tiny spots along the back.


Modifications for a Single Color
If you would like to test gauge in a single color or are making up your own color way and would like to make the motifs in a single color these are the modifications needed.
For the triangle this is straightforward, just follow the Organicon Option for Reducing Ends above but don’t change colors each round.

Happy Crafting!

Support My Work
Thank you for reading my blog, you are supporting my design work just by being here! Here are some other ways you can support my design work.
- Follow me on Instagram or Facebook – I post new pattern releases and such on my Instagram feed and Facebook page, following, liking, and commenting will keep you up to date and help other find my design work.
- Browse my self-published patterns – I have several patterns on Etsy and Ravelry. My portfolio of designs is not extensive yet, but I am continuing to add new patterns.
- Watch my Videos on YouTube– Video tutorials for each part of this CAL will be available on my YouTube channel along with a (very) few other tutorials I have made. Watching the videos, subscribing to my channel, commenting on and liking the videos will all support my design work.
- Affiliate links – Shopping through my links supports me at no additional cost to you as I get a small commission through my affiliates. Scheepjes Amazon Shop, Jimmy Beans Wool, Yarn Addicted and Co on Etsy (US shipping only)
Important Links
- My Main CAL Information Page
- Bonus Blog (FAQ, Yarn Quantities, Enlarging)
- The Scheepjes website page for the CAL – English/Nederlands
- Scheepjes official Tips and Tricks PDF
- Scheepjes International Facebook Group https://www.facebook.com/groups/ScheepjesCAL.International/
- Scheepjes Nederlandse Facebook Groep https://www.facebook.com/groups/scheepjescal/
- YouTube Video Playlists for the CAL
- Ravelry Pattern Page
- USA: Jimmy Beans Wool Scheepjes Yarn: Organicon Kit / Metropolis Kit
- World wide: Color packs in the Scheepjes Amazon Shop
Leave a Reply